Notebook Tables
Tables are a great way for you to organize your data in a tabular format and to perform quick calculations.
There are two ways for you to work with tables. One of them, for more advanced use cases, is using calculation blocks with the Language. Another one is using Table Widgets.
Table Widgets
To add a table widget to your notebook, type / and select Table.

Table Names
To make it easy to reference your table data on your notebook and other calculation you should pick a descriptive name for the table and for each one of its columns. We don't support spaces on the names (yet) but we do support emojis!

To reference your columns across your notebook we have a special syntax: TableName.ColumnName. In practice, you call the name of the table first, followed by a . and then the name of the column you want to reference.
Adding/Removing Rows & Columns
To add rows and columns you can use the + signs on the table widget.
To remove rows you can use the - button next to each row. To remove columns you need to go to the column settings and select Remove column.

Column Types
You can specify a column type depending on the data it holds.

Learn more about data types here:
Column Formulas
To perfom calculations on your tables you can use formulas.

Smart Rows
At the end of the table you can use the smart row to perform quick calculations on your column data.

Custom Units
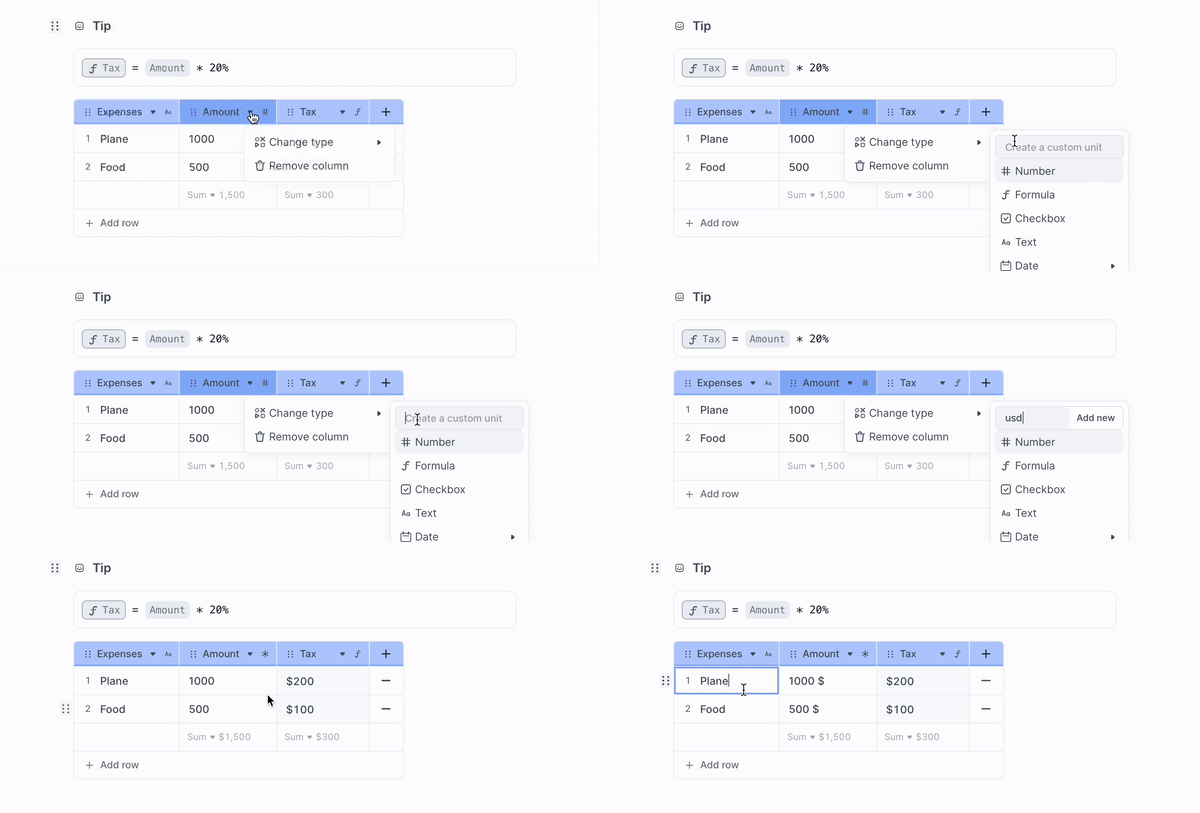
You can define custom units for your data columns.

Customization
Make each table unique by selecting a custom icon and color.

Learn More:
- See how to create more advanced tables using the Language: Decision Tables
- Learn how to organize your data using tables on: Data Organization